There are various applications for clear parts and prototypes. Fortunately, they are also fairly easy to make, with a variety of materials and prototyping techniques available for you to use.
This article will introduce the basics of transparent and translucent parts: why they might be needed, what materials can be used, what manufacturing techniques can be used, and other considerations such as polishing and colouring.
1. Why use Transparent and Translucent Parts?
Product designers can require clear parts for various reasons. Looking around you, you may see at least one transparent or translucent man-made object, which may be a glass window, a transparent container, a plastic glass cup, or a piece of food packaging.
However, in general, there are three (sometimes overlapping) reasons that make the part clear, and we will explain them here. Remember, transparent means completely transparent, so that people can see exactly what is behind the material, and translucent means partially transparent, so that people can see the light passing through the material or what is blurred behind the material.
1) Visibility
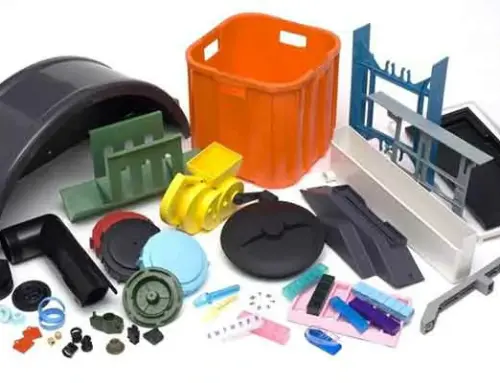
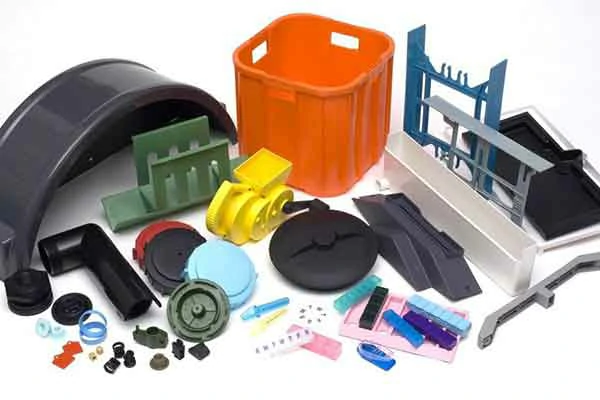
First of all, some parts are designed very clearly so that people can see through them for functional reasons. These items include windows, glasses, food containers, ID card holders and plastic boxes for office stationery.
Some parts of this type of material are usually completely transparent: they are designed to allow people to see exactly what is behind the transparent material.
2) Light
Secondly, we have the types of parts that need to be cleaned up. The functional reasons of these parts have nothing to do with human vision. This includes any object in which light must pass through a transparent material for mechanical or practical purposes.
For example, solar panel windows, greenhouses and glass greenhouses. Items such as flashlights and headlight covers, although related to human vision, can also be considered here, because the purpose of the transparent plastic part is to let light out, The contents of the part are not to be revealed.
3) Aesthetics
Third, the clarity of the transparent or translucent part is purely for aesthetic reasons. Humans can see through this part or see light coming out from behind it, but this has no practical use.
These transparent parts include clear electronic game and computer hardware, toys, plastic watches, acrylic musical instruments, designer bags, and handles for some tools/vessels.
2. What materials are there?
There are several materials that can be used to make transparent or translucent parts. They vary depending on the manufacturing process used.
| Process | Material | Pros | Cons |
| SLA | Clear resin | Time- and cost-efficient
High resolution |
Very weak and brittle
Needs support material |
| CNC machining | PMMA | Very high level of clarity
Easy to polish |
Brittle compared to PC |
| PC | High impact resistance
High temp resistance |
Less clear than PMMA
More expensive than PMMA |
|
| ABS | High impact resistance
Low cost Resistant to stress cracks |
Harder to color than PC | |
| Injection molding | PMMA | Very high level of clarity
Easy to polish Easy to mix colourants |
Brittle compared to PC
Resin must be dried before molding |
| PC | High impact resistance
High temp resistance |
Less clear than PMMA
More expensive than PMMA The resin must be dried before molding |
|
| ABS | High impact resistance
Low cost Resistant to stress cracks |
Harder to colour than PC | |
| Urethane casting | PX520 (PC-like) | Higher impact resistance | Inferior to true PC |
| PX521 (PMMA-like) | Higher level of clarity | Inferior to true PMMA |
3. How to make transparent and translucent parts
There are four main technologies for making transparent and translucent plastic parts. Each method has its own set of advantages and disadvantages, although CNC machining and rapid mold/injection molding are usually better end-use parts.
1) SLA
Stereolithography (SLA) is a 3D printing process that uses a focused laser to cure UV-cured resin layers. This is one of the fastest and most economical methods for manufacturing transparent parts, especially complex parts with bottom edges.
Advantage:
- Very fast
- Cost-effective
- Support complex geometric figures
- High resolution
Disadvantage
- Produce fragile and fragile parts
- The supporting structure must be removed after printing
- Materials are limited to resin formulations of specific brands
- Unrealistic or unaffordable orders for multiple units
2) Polyurethane casting
Polyurethane casting, a process that uses temporary silicone molds to make polyurethane parts, is the best way to create 10-20 clear copies of parts, regardless of their complexity. Like SLA, it does not produce solid parts, but it does produce excellent surface finishes.
Advantage:
- Cost-effective
- Very easy to color
- Simulate 2K modeling
- Good appearance
Disadvantage:
- Transparency is not 100%
- Produce fragile and fragile parts
- The mold can only last for 20 shots
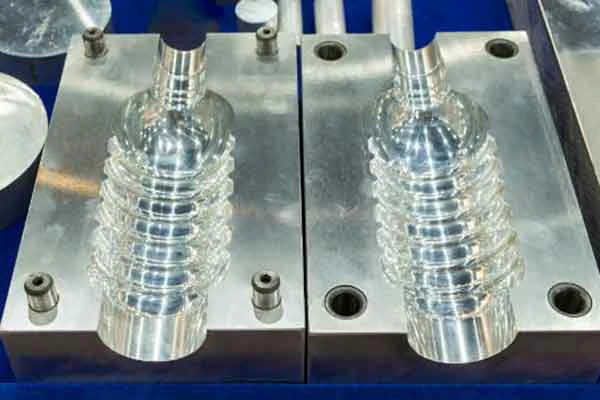
3) CNC machining
CNC machining is a subtractive manufacturing process that selectively removes material from the blank. It is the only way to achieve a perfect transparent prototype. It can also be used to make milky white translucent parts of DF23 and other materials.
If you use small tools (R0.1mm, R0.05mm, etc.), CNC machining can also produce ultra-fine details.
Advantage:
- High quality
- High definition
- Several material options
Disadvantage
- Expensive in large quantities
- Geometric freedom is less than SLA
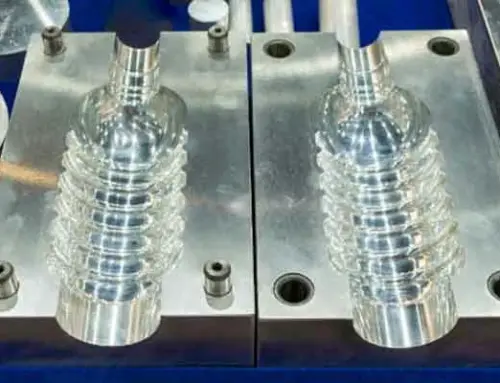
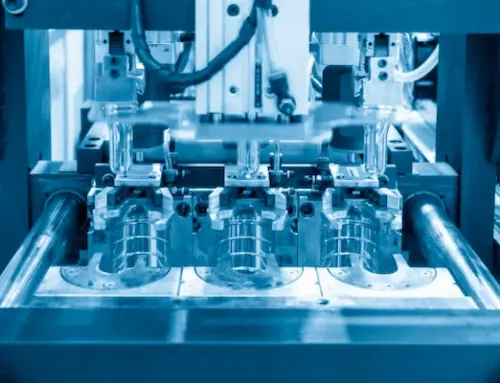
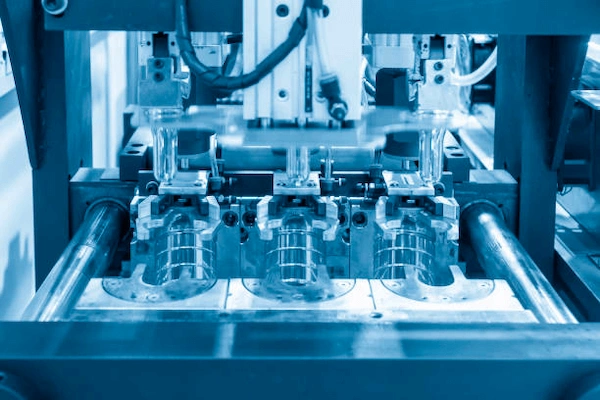
4) Injection molding
A clear part can be molded using injection molding, which involves injecting molten resin into an aluminium or steel mold.
Rapid tooling-making low-cost aluminium molds-suitable for 100+ parts, and when the production mold is best, 10,000+ clear parts.
Advantage:
- High quality
- Cost-effective mass production
- Wide range of materials
Disadvantage:
- Not suitable for small batch (1-100) orders
- Some geometric restrictions
5) Other methods
Laser cutting or water jet cutting allows us to make parts with simple geometric shapes. Through these two methods, we can make parts from transparent materials that may be too expensive for CNC machining or polyurethane casting, or materials that are not suitable for injection molding.
4. How to polish and add colour to clear parts
1)Polish
The level of transparency required for clear parts must be achieved through post-processing. Generally speaking, polishing after manufacturing is the best way to make SLA and CNC parts completely transparent.
For CNC-processed materials, especially PMMA, polishing can greatly improve transparency, partly because acrylic has high resistance to small scratches that may be caused by polishing equipment.
Polishing methods include polishing, flame polishing (standard/non-critical parts) and optical processing. PC is more likely to be scratched, so steam polishing is used to increase clarity.
Polishing can also improve the clarity of SLA parts. For these clear 3D printed parts, a three-part process consisting of wet sanding with liquid soap, corkboard cleaning with liquid soap, and polishing with a portable microfiber cloth can result in satisfactory results.
2) Colour
In addition to polishing, we can also introduce colour to clear parts, usually for aesthetic reasons. For injection molding or polyurethane castings, we can realize self-weaving and self-colouring in the molding stage by adding colourants and other additives.
In addition, we can also add colour or paint after molding, so that there are two colours on the final part.
For clear parts processed by CNC, we can use techniques such as sandblasting, colouring or texture painting to adjust the appearance. An excellent aspect can be achieved by using the colouring process in many clear parts.
You can choose from red, yellow, blue, or orange as possible colours. (Some colours, such as grey, are more difficult to control.) Painting is another simple option, but it may cause problems such as orange peel: undesirable uneven surface textures.

